Facial recognition
Facial Recognition Guide for Check-in
Our platform incorporates a facial recognition step to enhance security and streamline the check-in process. This guide provides instructions for first-time registration, subsequent verification, and troubleshooting.
First-Time Registration
When you use the check-in feature for the first time, you'll need to register your facial data. This is a one-time process to ensure secure and quick verifications for future check-ins.
Registration Steps:
- During the check-in process, you'll be prompted to register for facial recognition.
- Follow the on-screen instructions to capture your facial data accurately.
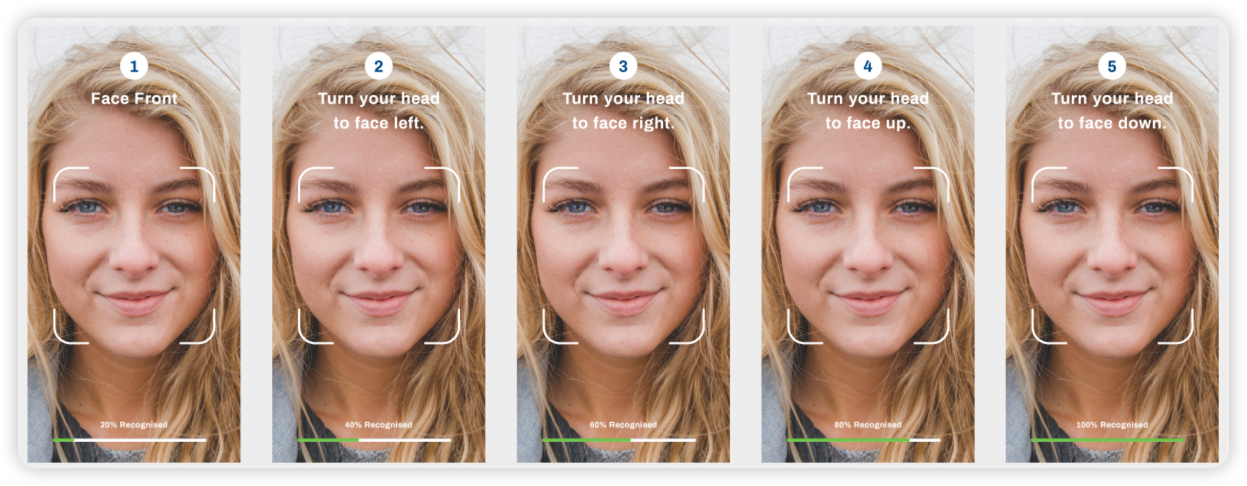
- After registration, the system will immediately ask for verification to complete the check-in process.
Verification:
- Look directly at the camera to allow the system to verify your identity based on the registered facial data.

- Upon successful verification, your check-in will be confirmed.
Subsequent Check-ins
For users who have already registered, the check-in process involves a simple facial verification step:
- During check-in, the system will use facial recognition to verify your identity.
- Ensure your face is visible to the camera for a swift verification process.
Troubleshooting
If you encounter issues, such as the system failing to recognize your facial features (possibly due to significant changes in appearance), a re-registration of your facial data may be necessary.
Resetting Facial Data:
- Contact HR/Administrative assistance to reset your facial data in the system.
- Once reset, you will need to re-register your facial data during your next check-in.
For any further assistance or inquiries regarding the facial recognition process, please contact our support team.